A crafty post!
Two posts in one day, this is a big deal!
But Can I tell you how excited I am to write a crafty post?
I have thought about starting another blog jsut for this reason, especially after discovering pinterest! Oh my! didn't just saying that word make you a little excited? Although I am a little bummed that pinterest is so huge now, i'ts like a giant city rather than a cute little village or farmers market. I was on there awhile before everyone else discovered how great it was. It's still great..... just bigger (for lack of a better word so late at night!).
This last Christmas I was trying to think of a present for my friends baby girl, she is the most precious little baby and I just adore her. I wanted to make her and her mommy something very special that represented this time in their life. I thought and and i thought and finally the last day before I had to send this package to them I got an idea. I really think my best ideas come at the last minute.
I collect a few things, sewing hoops being one of them! You can pick them up for pennies at the thrift store.


How I did this was super easy, just a little time consuming! And you don't need any expensive machine:) I first took the picture of Lyric to the website www.picnik.com and followed the directions from HERE to make the silhouette. Picnik is closing in April so if you want to make one get on it now if you don't have photoshop which does the same trick just at a much more complicated rate.
Then I printed it off on fabric using freezer paper. YOu can buy freezer paper in the same section at the grocery store where you buy tinfoil and parchment paper. It almost feels like wax paper but I assure you it has much more skill.
Cut a piece of freezer paper to 8.5″ x 11″. Then cut a piece of nice quality cotton fabric to the same size. Iron the freezer paper to the fabric onto the waxy side. I put a thin towel over the project as I was ironing. This sticks the two together and adds a stiffness to the fabric which allows you to send it through the printer. Then make sure you put it into the printer the right way so it prints onto the fabric side and not the freezer paper!
Print it off, peel back the freezer paper and voila! you're project is almost done! I was soo impressed with how this turned out. But it is not water proof so if you get any water on it it will smudge. Not so good for tshirts, totally fine for a wall hanging! Although you can buy ink that is waterproof:)
Last step was just putting it into the sewing hoop and trimming the edges! I adore Lyric and her mommy and thought this was a great gift. Thankfully she did too:) If you want one and don't want to attempt this yourself, i do have extra hoops, just send me a message and we can make something
beautiful together... ok that sounded really wrong, let's make umm. beautiful crafts together:)
Well sweet dreams, this girl is finally off to bed!
But Can I tell you how excited I am to write a crafty post?
I have thought about starting another blog jsut for this reason, especially after discovering pinterest! Oh my! didn't just saying that word make you a little excited? Although I am a little bummed that pinterest is so huge now, i'ts like a giant city rather than a cute little village or farmers market. I was on there awhile before everyone else discovered how great it was. It's still great..... just bigger (for lack of a better word so late at night!).
This last Christmas I was trying to think of a present for my friends baby girl, she is the most precious little baby and I just adore her. I wanted to make her and her mommy something very special that represented this time in their life. I thought and and i thought and finally the last day before I had to send this package to them I got an idea. I really think my best ideas come at the last minute.
I collect a few things, sewing hoops being one of them! You can pick them up for pennies at the thrift store.

But always check to make sure the two pieces, the outside and the inside fit together tightly.
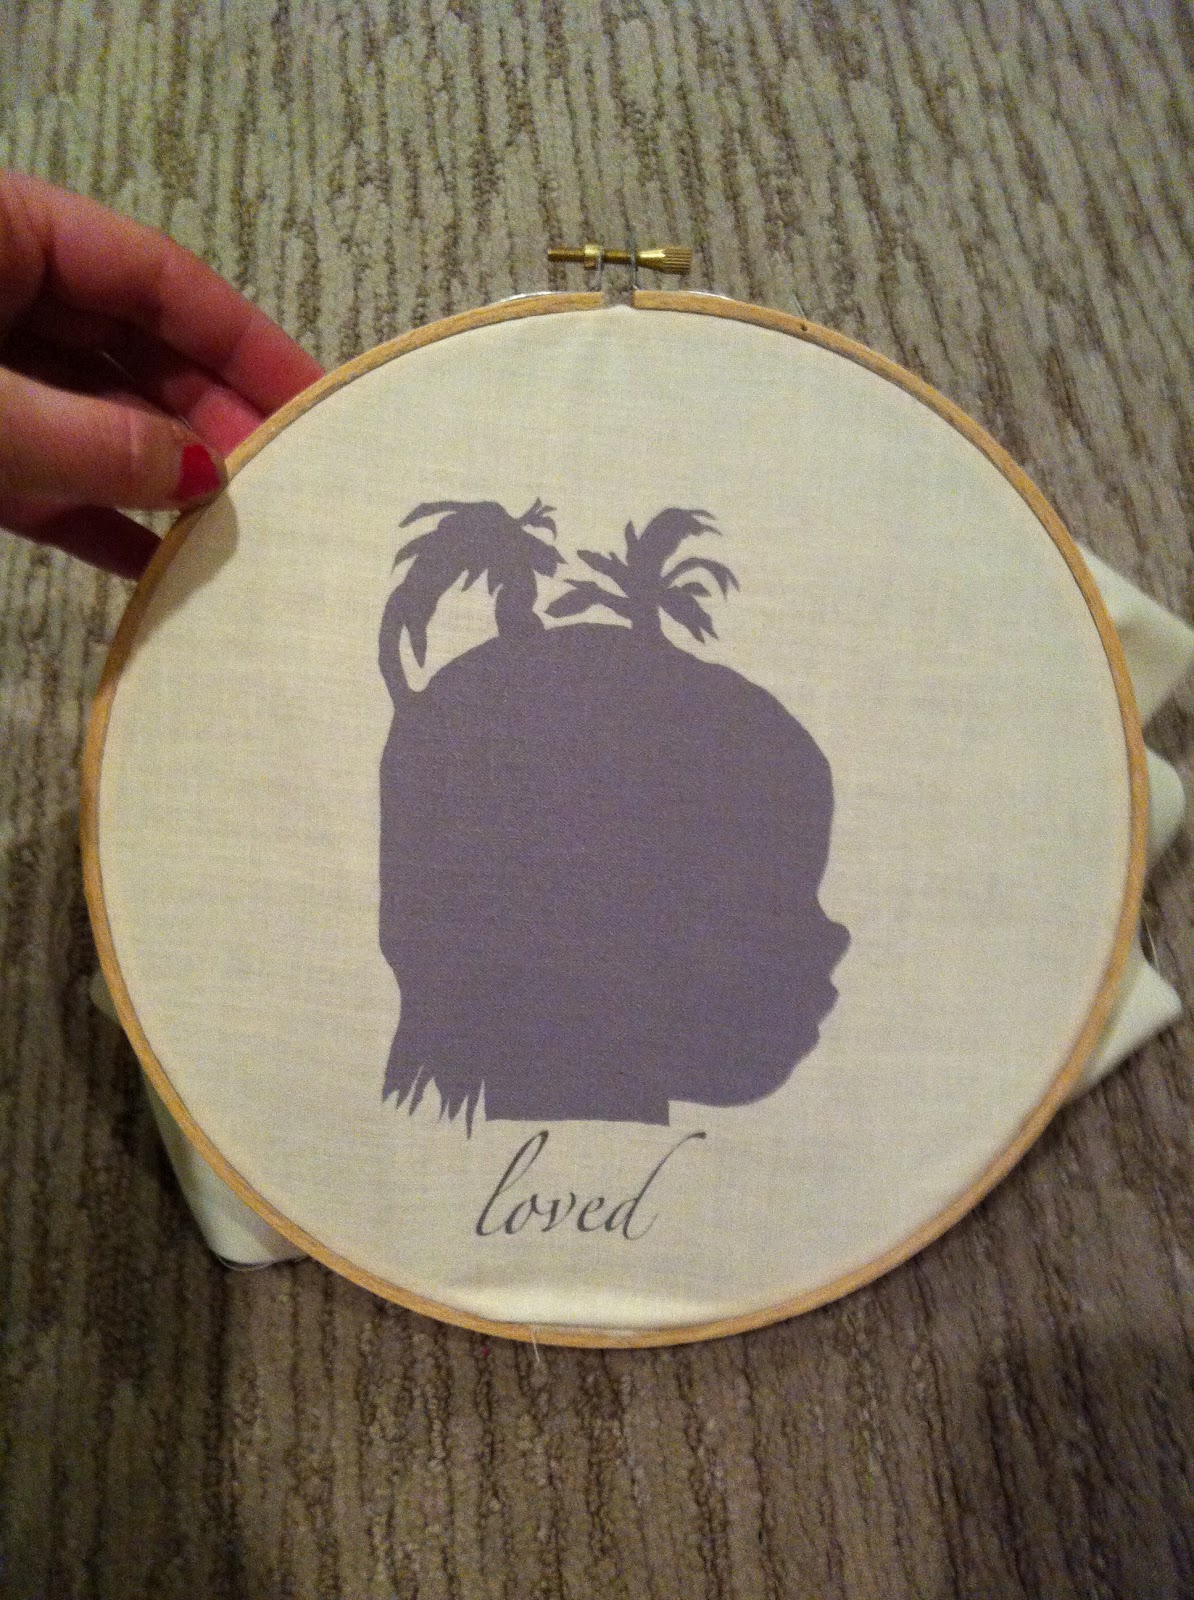
I also love silhouettes! There is something so sweet about the outline of a face, gives a different feel than a real picture. So this is what i came up with for little Lyric (love the name!) An outline of her sweet little head - you gotta love those pigtails. I wish I had taken a picture without my hand and with all the extra fabric trimmed but I didn't, end of story;) My perfectionism is gonna have to suck it up.
How I did this was super easy, just a little time consuming! And you don't need any expensive machine:) I first took the picture of Lyric to the website www.picnik.com and followed the directions from HERE to make the silhouette. Picnik is closing in April so if you want to make one get on it now if you don't have photoshop which does the same trick just at a much more complicated rate.
Then I printed it off on fabric using freezer paper. YOu can buy freezer paper in the same section at the grocery store where you buy tinfoil and parchment paper. It almost feels like wax paper but I assure you it has much more skill.
Cut a piece of freezer paper to 8.5″ x 11″. Then cut a piece of nice quality cotton fabric to the same size. Iron the freezer paper to the fabric onto the waxy side. I put a thin towel over the project as I was ironing. This sticks the two together and adds a stiffness to the fabric which allows you to send it through the printer. Then make sure you put it into the printer the right way so it prints onto the fabric side and not the freezer paper!
Print it off, peel back the freezer paper and voila! you're project is almost done! I was soo impressed with how this turned out. But it is not water proof so if you get any water on it it will smudge. Not so good for tshirts, totally fine for a wall hanging! Although you can buy ink that is waterproof:)
Last step was just putting it into the sewing hoop and trimming the edges! I adore Lyric and her mommy and thought this was a great gift. Thankfully she did too:) If you want one and don't want to attempt this yourself, i do have extra hoops, just send me a message and we can make something
beautiful together... ok that sounded really wrong, let's make umm. beautiful crafts together:)


Comments